Vacations are synonymous with sunshine, tan lines, and cerulean skies. But your favourite destinations unveil a whole new personality during monsoon season, coming alive with mist, clouds, thunder and tranquil rains. If summer vacations are the blockbuster hits everyone’s buzzing about, monsoon getaways are the indie films, intimate and atmospheric.
Monsoon vacations may not be mainstream, but they are full of quiet twists and calming moments. They offer what formulaic, high-octane summer blockbusters miss: a soulful depth.
Hari Ganapathy, Co-founder of Pickyourtrail, shared 5 international monsoon destinations, along with what you can see, do and eat there:
1. Bali, Indonesia
- Explore temples like Tanah Lot, enveloped in mist, or take a spiritual detour through a traditional Balinese purification ritual at Tirta Empul.
- Food here is monsoon comfort in a bowl, try babi guling (spiced roasted pig) or nasi campur, paired with warm jamur soup.
- Expect intermittent tropical showers that usually pass swiftly, leaving the air fragrant and the skies beautiful.
2. Chiang Mai, Thailand
- Known for its temples and tranquil charm, Chiang Mai becomes a green paradise during the monsoon months (June to October).
- Explore Doi Inthanon National Park at its greenest, where cloud forests and waterfalls like Wachirathan feel cinematic.
- Visit the striking Wat Phra That Doi Suthep temple in the rain; it’s an atmospheric experience.
- Adventure seekers can take on white water rafting in Mae Taeng or zip line through rain-soaked canopies.
- Indulge in khao soi, a rich curry noodle soup, or enjoy a sticky rice mango platter while taking shelter in a local market.
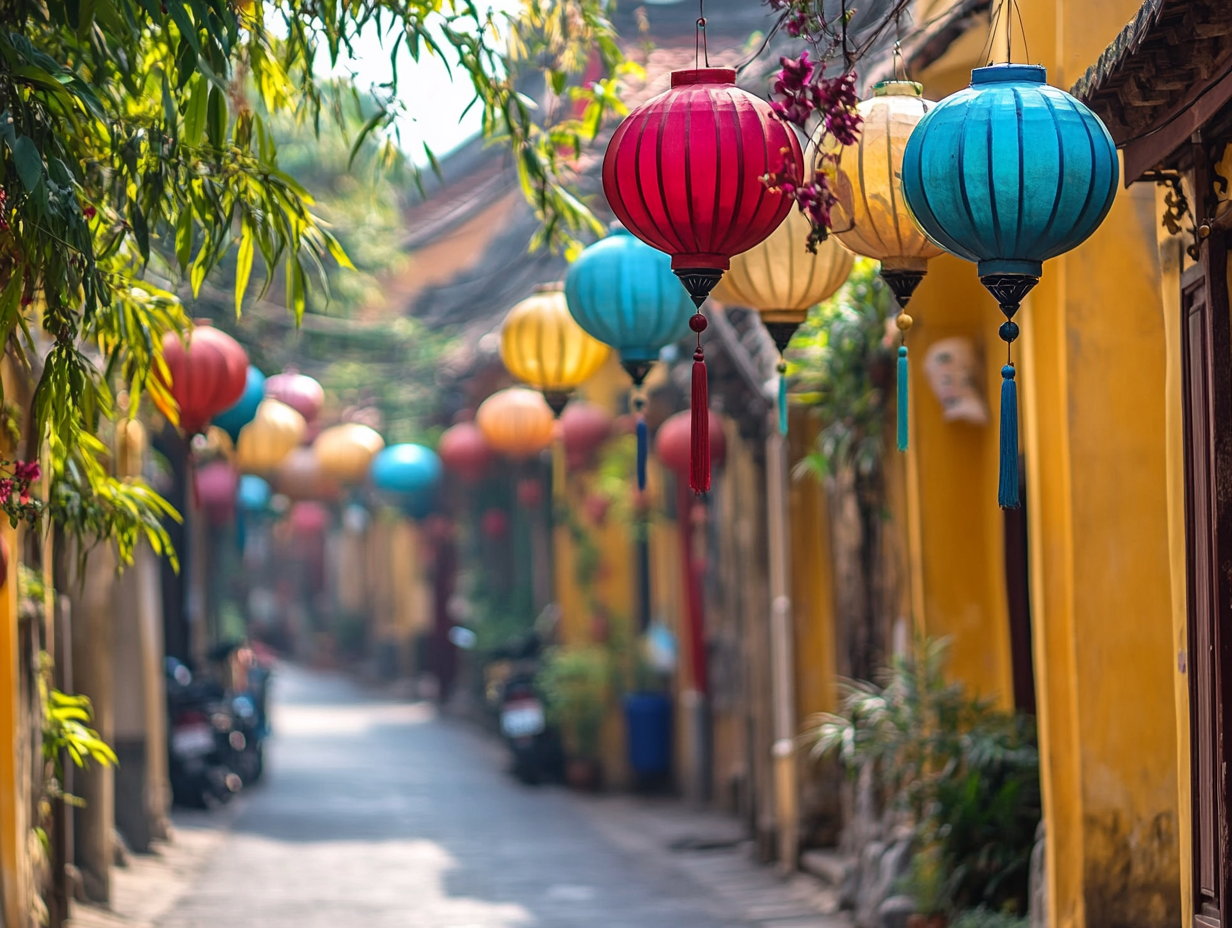
3. Hoi An, Vietnam
- UNESCO-listed old town, Hoi An, during its rainy season (typically September to January) turns beautiful.
- Try Cao Lau noodles or Banh Mi with a distinctly Hoi An twist.
- Try Vietnamese drip coffee.
- Stroll under umbrellas through lantern-lit streets, browse local tailor shops, and enjoy a boat ride on the Thu Bon River.
4. Highlands, Sri Lanka
- Sri Lanka’s central highlands, particularly Nuwara Eliya, Ella, and Kandy, look pretty during the monsoon months. The tea plantations, waterfalls, and lakes look more beautiful.
- The scenic train journey from Kandy to Ella is stunning, going through cloud forests and emerald slopes.
- Hike Little Adam’s Peak post-shower for panoramic views, or cosy up in a colonial-era bungalow with a fresh cup of Ceylon tea.
- Try a traditional Sri Lankan curry meal- kottu roti, hoppers with egg, or a rich crab curry.
5. Kyoto, Japan
- Kyoto’s monsoon season (June to mid-July) makes the scenery look calming.
- With fewer tourists, one can explore the bamboo groves of Arashiyama or take a quiet stroll through Gion’s narrow alleys without distraction.
- Visit the temples Sanzen-in and Mimuroto-ji, which have hydrangeas blooming in several shades across the temple grounds.
- Try warm bowls of udon, seasonal tempura, and matcha desserts, which are best enjoyed in a traditional ryokan.
- Join a tea ceremony in Kyoto.