latest posts

How to Get Over Your Fear of Flying, According to Experts
travel

How to Get Over Your Fear of Flying, According to Experts

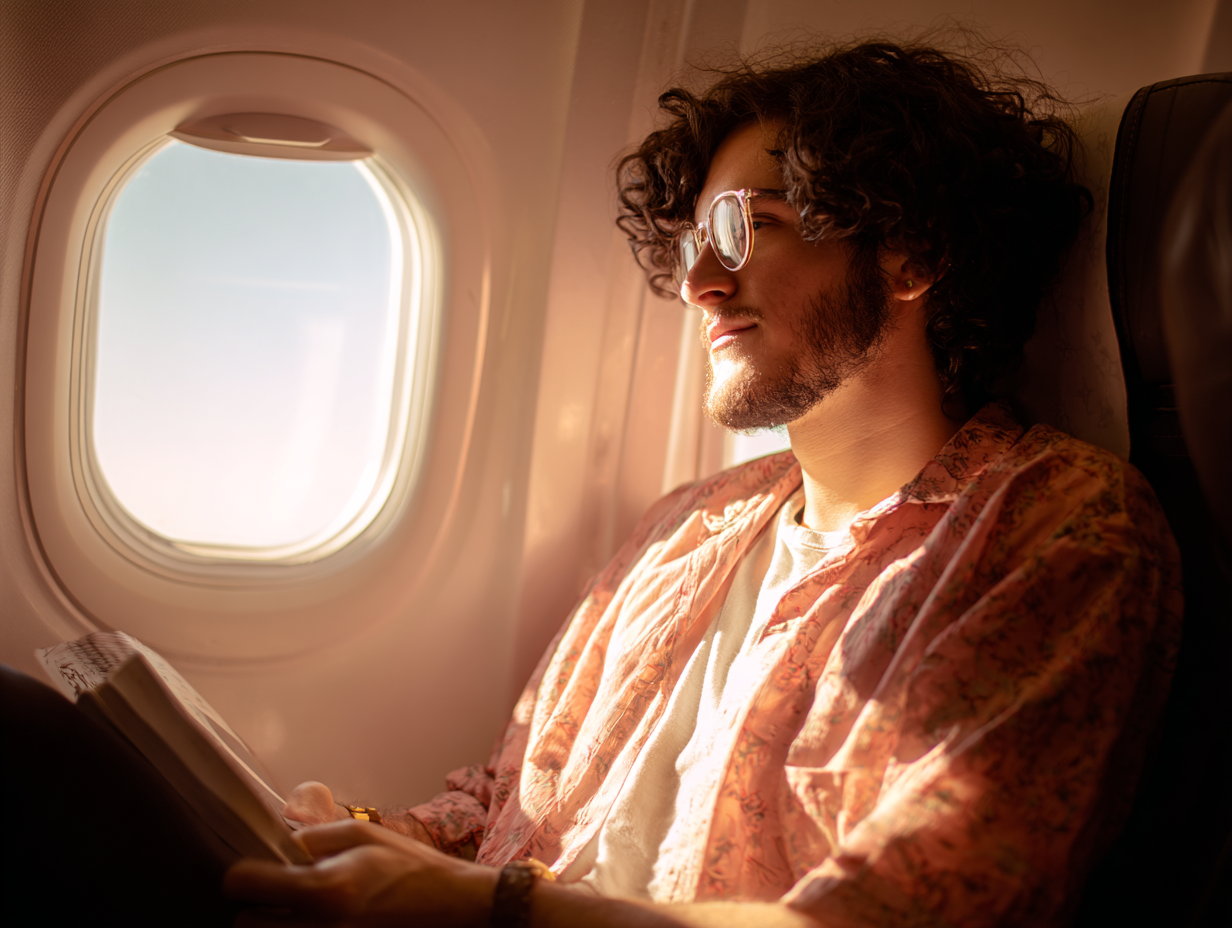
If the idea of flying makes you nervous, you’re not alone.

If you live with aerophobia—aka the fear of flying—you are far from alone. According to 2024 data, some 25 million Americans fear flying to some degree, which can interfere with travel plans and even lead some to stay home rather than head off on adventures of a lifetime.

“Fear of flying can be a deeply uncomfortable condition to live with. It’s not just the physical discomfort during a flight that can occupy a great deal of your energy, but also the feelings of shame and embarrassment about this fear that can make life harder,” Jenny Maenpaa, a licensed clinical social worker and founder of the New York City Psychotherapy Collective, told Travel + Leisure. “There are various ways to work on this, and it’s important to recognize that each person’s fear is unique, whether it’s rooted in past trauma, a generalized anxiety disorder, or simply unfamiliarity with the mechanics of flight.”

Indeed, there are ways to combat this fear to ensure you see as much of the world as possible. Here are a few things to try to overcome your fear of flying from the experts so you can comfortably soar at 35,000 feet.

Figure out the root cause.

According to Maenpaa, it’s essential to find the root cause of the fear and investigate its emotional origins. “This might involve understanding past experiences of a turbulent flight, hearing stories from others as a child that exacerbated your fear, or related beliefs that may have contributed to the fear,” Maenpaa said. “Deeper exploration can reveal hidden triggers, and confronting these through psychodynamic therapy that brings the past into the present can be transformative.”

Try exposure therapy.

After trying to understand where your fear came from, you could try to confront it with exposure therapy. “An effective way to overcome a fear of flying is through gradual exposure and learning how to calm your nervous system,” Abrah Sprung, a licensed clinical psychologist, told T+L. “Start by watching videos of planes taking off, then visit an airport without boarding a flight, and build up to taking a flight.” Facing your fear, Sprung said, is a step-by-step process that retrains your brain to respond “with confidence instead of panic.”

Or think about cognitive behavioral therapy.

According to Ashley Pena, the national executive director for Mission Connection, cognitive behavioral therapy (CBT) is one more approach to overcome your fear. “CBT helps you identify and challenge irrational fears about flying,” Pena said. “Many individuals catastrophize the experience (‘The plane will crash,’ ‘I’ll have a panic attack and embarrass myself’), and CBT helps replace these thoughts with more balanced ones.” This may be perhaps one of the easier approaches to take. As Pena said, it can be done via virtual therapy so you can do it from the comfort of home.

Learn a simple breathing technique.

Sprung offered another easy tip to try the next time you’re feeling anxious on a flight: attempt box breathing. “To practice, inhale for four seconds, hold for four, exhale for four, and hold again for four seconds,” Sprung said. “This helps regulate your nervous system and reduces anxiety.”

Or this grounding exercise.

Pena also offered one other simple sensory grounding technique: the “5-4-3-2-1.” On your flight, try to identify five things you see, four things you touch, three things you hear, two things you smell, and one thing you taste. “This keeps your mind present rather than focusing on fear,” Pena said.

Download the right apps.

If you need a little more guidance on how to relax before or during a flight, that’s OK. According to Rostilav Ignatov, the chief medical officer at The Haven Detox, there are plenty of apps to help you do just that. “Tools like meditation and relaxation apps for travel stress relief, such as Headspace, provide guided meditations and breathing exercises to encourage relaxation and reduce stress,” Rostilav told T+L. “These apps are highly accessible and can accompany travelers on flights, making the flying experience more comfortable and less intimidating.”

And avoid certain triggers.

This one is a bit of a bummer, but it’s a good idea to forgo that glass of airport wine or a cookie if you suffer from any type of flight anxiety. “Unfortunately, alcohol and sugar are not the solutions to anxiety,” Erin Weinstein, a hypnotherapist and psychotherapist, told T+L. “As difficult as this may be to accept, consuming a drink or sugary food before a flight can actually increase your anxiety despite providing temporary relief.” The reason is that alcohol and sugar cause your blood sugar levels to spike as they are digested. “That spike leads to your heart racing. That jittery sensation you experience may feel like panic, but it’s really just your body reacting to what you’ve consumed,” Weinstein said. And if you already have flight anxiety, you may start to associate this “jittery” feeling with flying, “potentially triggering a spiral of distressing thoughts.”

Undergo hypnosis.

Weinstein also suggested trying hypnosis if you have a fear of flying, as it “helps people build a personal ‘calm button’—a phrase, image, or sensation that instantly shifts them into relaxation mode.” She noted you can try it by listening to guided hypnosis on YouTube or booking a custom recording from her.

Keep your mind busy.

Michelle English, the executive clinical manager at Healthy Life Recovery, said keeping your brain busy on a flight may be enough to sidetrack you from any fears. “Bring something that can distract you—like a book, music, or a movie,” English said. “The more you focus on something else, the less time you’ll have to think about and dwell on your fear. It’s a simple trick, but it works for many people—keeping your mind busy can help calm your nerves and make the flight feel faster.”

Talk to the crew.

Sometimes, chatting up the crew before takeoff can help calm those nerves, too. “One thing that can help is to talk to the flight crew. Ask any questions that you might have,” Jay L. Serle, the clinical supervisor of behavioral health at The Ohana Addiction Treatment Center, explained. “This can demystify flying and help a person understand more about things like turbulence, which can be scary for many. Simply understanding more about flying, turbulence, and other flight-related concepts can make a world of difference when it comes to alleviating anxiety.”

Understand that flying is abundantly safe.

One more critical thing to do is to understand that flying is abundantly safe. “Flying is one of the safest modes of transportation,” Sprung said. “Planes are built to handle turbulence, and pilots train extensively for every scenario. Turbulence may feel scary, but it’s just like bumps on a road—uncomfortable but not dangerous.” Sprung added that it’s a good idea to “trust the data” since “the odds of a plane crash are about 1 in 11 million, making flying far safer than driving. Learning about the science behind flying can replace fear with understanding.”

Maenpaa also added that those who live with a fear of flying should understand that it doesn’t need to control them. “By reframing thoughts, learning more about flight safety, and understanding the systems in place to keep us safe, people can find comfort in the knowledge that flying is one of the safest ways to travel.” She, too, cited the stats, including those from the National Transportation Safety Board that show that planes are designed to withstand even direct lightning strikes, and that “you only have a 1 in 1.2 million chance of being in a plane crash, and the overall survival likelihood if you are in a plane crash is over 95 percent.”

While yes there have been accidents, “millions of planes take off and land safely every single year without incident,” Maenpaa said. “Arming yourself with this knowledge can help you stay calm during moments of bumpiness or uncertainty mid-air, leading to significant improvements in your quality of life each time you fly.”

Read More
8 Top tips for hiking uphill
Lifestyletravel

8 Top tips for hiking uphill

Steep ascents demand smart strategies! These uphill hiking tips will help you climb smarter, not harder.

1. Start with a sustainable pace

Rushing uphill depletes energy fast, especially at altitude. Begin slower than you think you need to, focusing on a rhythm where you can still hold a conversation. On trails where elevation gains are relentless, breaking climbs into 10- to 15-minute segments with quick breath-catching pauses helps maintain stamina.

2. Breathe like a pro

Thin air at higher elevations can leave you lightheaded. Practice rhythmic breathing: inhale deeply through your nose for four steps, then exhale fully through your mouth for another four. This diaphragmatic technique maximises oxygen flow, keeping fatigue at bay during long climbs.

3. Perfect your posture and technique

Leaning too far forward strains your back, while standing too upright throws you off balance. Instead, hinge slightly from the hips, keeping your spine neutral. On steep sections use the “rest step”—pause briefly with each stride, locking your back leg to let your skeleton (not muscles) bear the weight momentarily.

4. Trekking poles and boots

Trekking poles are game-changers for navigating uneven terrain uphill. Adjust them to 90-degree angles at the elbow to propel yourself upward while reducing knee strain. Pair them with sturdy boots—opt for a pair with grippy soles to avoid slips and ankle twists.

5. Train for the terrain

These uphill hiking tips mean little without preparation. Strengthen quads and glutes with lunges and step-ups, and mimic climbs on stair machines or local hills. For high-altitude hikes, arrive a day early to acclimate and reduce altitude sickness risks.

6. Pack light, pack right

Every extra kilogram strains your legs on ascents. Prioritise essentials and use compression sacks to save space and keep your load balanced.

7. Easy as you go

Loose gravel requires short, deliberate steps. Test footholds before committing your weight, and engage your core for stability. If slopes feel too steep, zigzagging reduces the gradient and eases the burn in your calves.

8. Know what you’re in for

Research your route’s difficulty beforehand. Some uphill trails are beginner-friendly, while others demand experience. If fatigue hits, there’s no shame in turning back—the mountain will wait.

Read More
Traveling Internationally Use These Tips to Avoid Roaming Phone Charges
Lifestyletravel

Traveling Internationally? Use These Tips to Avoid Roaming Phone Charges

Roaming fees on your phone bill are the worst souvenirs. These tips show you how to use apps and data stress-free while abroad.

With modern smartphones, travel is a lot easier than it used to be. The Android or iOS supercomputer in your pocket has all the crucial apps and baked-in features to smoothly reserve hotel rooms, navigate cities, translate signs through the camera and pay for goods and services. You can even translate conversations in real time with AI-powered tools as well as ask your AI-powered assistants for travel tips.

But all those fancy phone features and apps require a data connection, which is included in your domestic phone plan but typically costs extra through roaming fees when you travel beyond your home network. Here’s how to avoid those charges.

First and foremost, you’ll want to understand how pricey those extra charges are or whether you’ll be traveling to a region that’s cheaper or free with your carrier. Some mobile carriers have partnered with carriers in other countries for more-affordable roaming or even free service, albeit with some restrictions. For instance, some plans, such as T-Mobile’s Essentials, have free service in Canada and Mexico but only at slow “2G” and “3G”-like speeds, so don’t expect to stream a lot of video with that connection.

But traveling to most countries will require you to pay mobile roaming charges if you try to use data services, make voice calls or send text messages on your phone as normal. If that’s your plan, check out our guide for the best travel phone plans.

If you want to avoid mobile roaming charges, keep the following tips in mind.

Set up mobile service before you leave

Some carriers will let you pick traveling service options ahead of time, which can include daily, weekly or monthly flat fees to get service from partner carriers in other countries. You can wait until you arrive at your destination and wait to be prompted to select your chosen service or you can set it up ahead of time. Note that some carriers will simply default you to these services rather than charge you higher roaming fees, although it’s worth confirming before you travel.

These international plans are pretty convenient, although some may come with caveats such as being deprioritized behind other carrier customers, meaning you’ll get slower speeds during peak traffic times. Check the fine print of each travel plan to know its restrictions and what you may need to pay for extra service.

Verizon’s international plans start pretty simply, with $10 a day getting you 2GB per day of high-speed data and unlimited 3G-speeds data thereafter, as well as free voice calls and texting, in more than 210 countries. That plan is discounted to $5 per day in Canada and Mexico.

If you have one of the carrier’s latest plans, known as Unlimited Plus and Unlimited Welcome, you’ll get these features included for Canada and Mexico. Customers with Verizon’s top Unlimited Ultimate option will get this international data for Canada and Mexico as well as for more than 210 countries.

AT&T has a similar $10-per-day travel plan for unlimited data, voice calls and text. The data counts against your usual plan’s allowance; going over will result in a charge and/or reduced download speeds of a super slow 2G-like connection. If you don’t sign up for this plan, traditional roaming fees kick in, charging per text message, megabyte of data and minute of voice calling.

Unlimited data for Canada and Mexico is included in AT&T’s main Unlimited plans, while the carrier’s Unlimited Premium PL and Unlimited Elite plans also allow unlimited data in 20 Latin American countries.

T-Mobile has its own international plans with unlimited calling, but they’re pretty modest with data, starting at $5 per day for half a gigabyte of downloaded data. Keep in mind that the carrier’s standard plans also include some international data allowances.

The basic Magenta and Go5G plans offer up to 10GB of high-speed data a month in Canada and Mexico, and once that’s used up, get unlimited data at very slow 2G speeds (as previously mentioned, the cheapest Essentials plan only gets data in Canada and Mexico at 2G speeds). Go5G Next, Go5G Plus and Magenta Max plans have a small 5GB monthly travel allowance for high-speed data in more than 215 countries, although that’s subject to potential extra taxes and conditions. Standard Go5G plans get the same 5GB data allowance in 11 European countries.

Although it’s possible to bump up your plan for the month (or more) you’re traveling and return to your old plan thereafter, it’s likely simpler to just pay for international data.

Getting mobile service directly from a local carrier

Before carriers got friendlier with their international agreements to support each other’s customers, one of the better traveling strategies was to get service straight from the carrier in the country you were traveling in. Once you landed, you’d just walk into a local carrier’s retail store and get a prepaid SIM card to last you the length of your trip.

That’s still possible today but it’s a bit more complicated. If you have one of the many phones that lack a physical SIM slot, including the latest iPhone 15 series and Samsung Galaxy S24 series, you’ll have to register for service through one of the eSIM accounts on your device. It’s pretty easy to do and is in fact one of the benefits of having multiple digital eSIM slots — so you can have one for domestic use and one for traveling — but it requires you to register through the carrier in question. You can even load the eSIM before you travel, through apps such as Airalo and Ubigi.

Unfortunately, there’s something else to consider: whether your phone is unlocked, that is, not tied to a carrier and restricted in using eSIMs from other carriers (even international ones). If you bought your device unlocked, you’re in the clear.

If you’re paying off your phone in installments from your carrier, it’s complicated. Verizon users have it best, as their installment plans unlock phones after 60 days. AT&T and T-Mobile, however, require you to finish your installments and fully pay off your phone to unlock it. Because AT&T’s plans have a minimum of 36 monthly installments, customers may be out of luck getting a local carrier eSIM unless they’re nearing the end of their contract — in which case it may make sense to pay the balance for more travel freedom.

Relying on a hotspot and tethering

Another method to avoid roaming is a bit more roundabout and requires you to sign up for service with a local carrier anyway but you won’t have to fiddle with eSIMs. When you land in your country of travel, you can rent a mobile hotspot (or register service on one you already own), which is a handheld device that turns cell signals into Wi-Fi.

Note that you’ll still need to pay for service either from the hotspot maker or from a local carrier, and there’s no guarantee that their networks will play nicely with a given hotspot device. Check that it’ll work in the area you’re traveling to.

Once you have one set up, you just connect to the hotspot’s Wi-Fi using your phone as normal. While it’s a bit more cumbersome, this also lets you get internet for your other devices, such as tablets and laptops, pretty much anywhere you get a phone signal from a local carrier.

Another caveat is that you’ll need to keep the hotspot itself charged, which is another device battery you’ll have to worry about. It might be worth carrying an external battery to make sure your hotspot can last a full day while you’re out and about.

Ultimately, whatever option you choose should fit your travel habits and destinations. Some carrier partnership options will be more appealing but offer slower speeds than getting service straight from the local carrier. But don’t worry about getting locked into a choice: You can always try out one way when you arrive and switch to another if a better choice presents itself.

Read More
How to Take Better Travel Photos
photographytravel

How to Take Better Travel Photos

When you travel, one of the best ways to capture your favourite moments is with a camera. Photos are a living memory of your trip and also something you can show your friends and family. They freeze those perfect amazing moments while you’re travelling or on holiday.

I have been travelling for the past few years and in that time I developed a passion for photography. By no means did I have any idea what I was doing before that nor did I have much of an understanding of technology. In fact, until I got my first camera 2 years ago I hadn’t taken many photos before.

The reason this is important is that when I did start to learn, I found that this elusive industry was actually not that hard to pick up and learn.

Often photographers like to over complicate things. People like to think no one could do what they do, and maybe for some of the most elite photographers that is true, but, to take and edit a great landscape shot to post on social media or show your friends – it’s really not that hard.

I’m going to show you how to take better travel photos in this guide by explaining what makes a great shot and how to edit them.

Composition

A good composition is the most important factor for getting a great travel photo. The composition is what the photo is made up of, or what you include in the frame. Basically, it’s where you point the camera and at what.

Here are some great examples and styles of good composition’s to improve your travel photography.

Using the foreground

One of the best tips for creating a really engaging photo is by placing something in your foreground. This helps with depth of field and really makes images look more engaging to the viewer. It has the effect of putting them in the moment or taking you back to that moment. See images below for examples.

Human Scale

Using human scale is another great way of showing just how amazing the place you are shooting is. By putting someone in the frame far away you can really gauge the size of the place you are visiting. This is best used in large shots of valleys, mountains, etc.

Alternatively, you can also use objects to show scale, or if you have a good camera for wildlife photography, animals work too!

Symmetry

I love composing shots with perfect symmetry. There is something so soothing about looking at a shot that’s perfectly symmetrical.

Leading lines

Using leading lines is one of the most powerful tools for directing someone’s eye to the subject. Leading lines are essentially anything in the photo that leads to something. This can be footprints, logs, roads, rivers etc. When out in the field looking for a shot, keep an eye out for anything that directs your eye to something.

Silhouettes

I love shooting silhouettes. They are great during early sunrise or late sunset. They also help the viewer imagine themselves in that location. A great tip is to focus on body shape. If you stand with your hands by your side and feet together you’re going to look like a blob. So keep your arms and legs out and your silhouette travel photos will be looking good!

Allow for Cropping

If you are shooting a photo from social media then you need to consider that in your composition. Let’s take Instagram for example. The best crop for Instagram is a 4×5 ratio. This allows your photo to take up the most of someone’s screen making it stand out more. No camera takes photos in that ratio so you need to allow for the cropping of your image in your composition.

If you shoot landscape, then you will only be able to use a small amount of that photo when you crop to 4×5. However, if you shoot in portrait you will be cropping less of the photo. This is why I almost always shoot in portrait when I am shooting a photo for Instagram. It makes it a lot easier to get a good composition.

Editing

Yep, it’s true! Almost all the photos you see on social media are edited, but it’s not always what you think.
Many photographers shoot in RAW instead of JPEG. This means that your image has not been processed at all and needs editing. A JPEG is essentially an edited RAW photo but it’s been done by your camera (as opposed to a person.)

So, don’t get too angry when someone says a photo is edited as any photo you take on a smartphone is edited by a highly smart internal computer!

The benefit to editing yourself is you can put your own spin on an image and be more particular about what you love about it and what you don’t. If you really want to take amazing travel photos then consider shooting in RAW as it means you can edit an image more without losing quality. With that said, you can edit JPEGs perfectly fine too.

Editing Software

The best editing software for beginners is Lightroom by Adobe. In Lightroom, you can make all your general adjustments and well as many more! You can get the Lightroom app for free, however, you do have to pay a monthly fee for the software. You can get Lightroom on mobile and desktop for as little as $9.99 USD per month.

To me, the program is good value and the Lightroom only plan comes with 1 terabyte or 1000gb of cloud storage.

There are two Lightroom programs. One is Lightroom CC, this is the app based editing and can be used on phones and desktop. It’s slightly simpler and easier to use version.

The other is Lightroom Classic CC. This is for desktop based editing and is a little more complicated but still very easy to use. It comes with a few extra features. There is a package that includes both Lightrooms and Photoshop for $9.99 per month.

I honestly use Lightroom every day and love the software. It improved my travel photos a lot.

Learning how to use Lightroom

The best way to learn is on Youtube – this is how I learned. There are countless videos that show you how to use Lightroom, and to be honest, once you learn the basics it’s really easy. The trick is to develop your own style and it helps bring out the artist in you.

Get a tripod!

Travelling with a tripod is a great way to improve your travel photos. When it comes to getting the right composition a tripod really helps but it also helps keep your photos as sharp as possible no matter your shutter speed.

When it comes to using it for composition, it is a great idea to switch from your eyepiece to your LCD screen so you can see a live photo of what you’re shooting. This means you can really visualize the shot and make small adjustments. It’s crazy how the most minor adjustments can affect your photos.

Of course, tripods can be bulky so it best to get a lightweight travel tripod in order to make travelling with it easy. A lightweight travel tripod actually makes for a great gift idea for hikers or travelers who love photography! I got mine for Christmas last year and was thrilled!

Stop putting pressure on yourself!

I really believe that your mood shows in your photos. If you’re stressed about getting an amazing shot it just won’t happen. Shooting should be done with a smile and a positive attitude. Just remember that there are plenty of times to shoot again.

I always get the best photos when I’m happy and relaxed. I find myself far more creative and inspired! So relax, smile, and enjoy capturing beautiful moments without worry!

How to take better travel photos is a big topic online. Honestly, there is no magical answer just a few techniques that can help you improve. The best way to learn is to take some of the examples I used and copy their different styles in the field. This will be great practice for you and will help get you on the right track.

Read More
1 30 31 32 325
Page 31 of 325


Privacy Policy   |   Contact Us   |   For Advertisers