Before the advent of drones, people had to rely mostly on airplanes or helicopters to take aerial photographs. Now, thanks to increasing availability and decreasing price points of drones, as well as advances in obstacle avoidance technology, GPS navigation, battery life and camera stabilization, it certainly seems easier to take photographs from higher elevations.
But that doesn’t mean anyone with a drone can make excellent photographs. Here are some practical tips on the logistics of drone usage and suggestions to make better photos while traveling.
First, know the rules
In the United States, the Federal Aviation Administration oversees drone regulations, and FAADroneZone is the country’s official website for understanding drone requirements and managing drone services. If you are a recreational flyer, you must pass an aeronautical knowledge and safety test, called the Recreational UAS Safety Test, before flying your drone.
The drone company DJI also has a detailed website that instructs drone users on local rules and regulations.
The basic rules for flying a drone as a hobbyist — that is, recreationally using a drone — are to fly the unmanned aircraft only at or below 400 feet, always keep the drone in sight, do not fly in restricted airspace and do not fly over groups of people. If you are flying your drone commercially, you must become a certificated remote pilot by passing the F.A.A.’s Part 107 test. This is a more extensive test and covers additional drone rules, airspace regulations and weather conditions.
Be aware that many countries may have different regulations. Anywhere you go, you may be fined or your aircraft may be confiscated if you do not adhere to the rules.
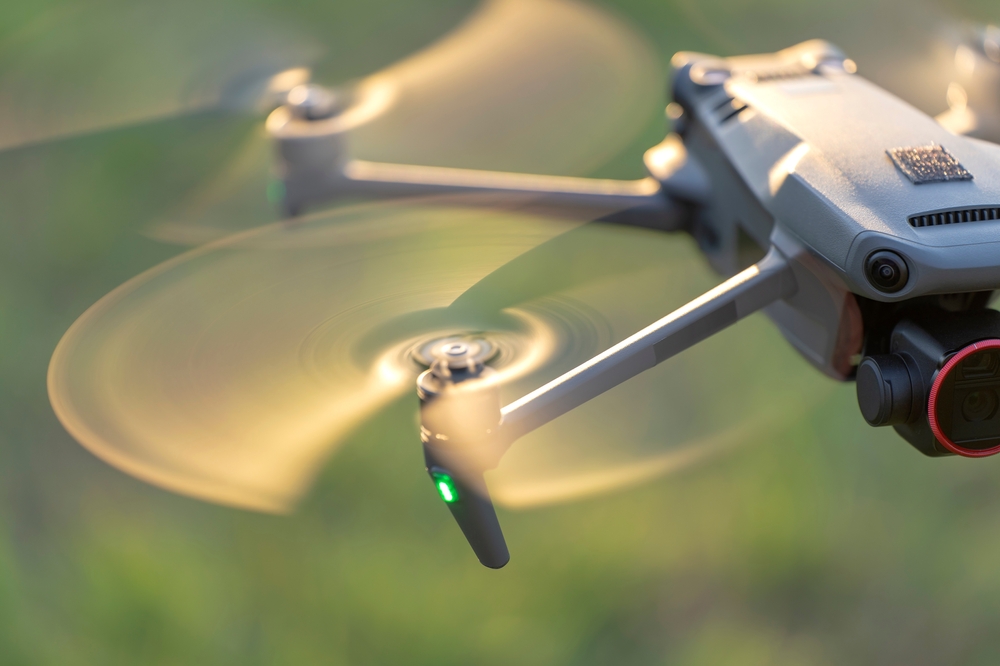
Understand what your drone can do
Drones are incredibly fast, maneuverable and precise. You can fly up to 400 feet and move laterally in an infinite number of directions to get the perfect shot. But first-time drone flyers often fly as high as possible and take pictures that lack a point of focus or a strong composition.
In order to get photos with the most detail, set your drone to the lowest ISO, usually 100. This is the feature that sets the camera’s sensitivity to light and was known as the film speed back in the days of film. To achieve the best quality pictures, it’s best to shoot in RAW format, which is a digital image file that is unprocessed and contains the most amount of data. When processed, this will produce photographs with the most detail.
After you have purchased your drone, it’s good practice to regularly update the firmware, which is software that provides basic instructions for the craft’s hardware to function successfully, like the drone and remote controller working together.
Use maps and the weather forecast, and time it right
Whether you consult an atlas or follow your car or phone’s navigation, maps are very effective tools for seeing the shape of a river, lake or pond and provide ideas for good aerial subjects.
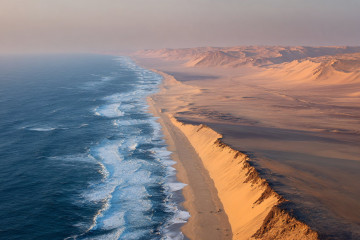
Once you have a location, shoot during the “golden hours” — taking photos around sunrise and sunset will often produce the most dramatic pictures with warm light and shadows. It’s a good idea to keep an eye on the weather forecast to know the sunrise and sunset times and also what the weather will be. High winds and rainy or snowy weather make flying a drone much more difficult.
Look for patterns, lines and light while flying
Many times a drone photographer will make discoveries from the air. You might launch with the idea of photographing one thing and, while in the air, you might discover something more compelling. Rivers, solar arrays, farm fields and trees can provide engaging patterns and lines.
And don’t forget the light and shadows, either. Good light can make or break a photo. Sometimes the best light means a golden sunrise, as we said earlier, but sometimes it means an overcast day with diffused light. On cloudy days, shooting straight down on a subject can be very effective.
Taking drone photos at twilight can also be very captivating. This is the time after sunset and before nightfall. Set the drone to manual exposure, set the ISO to 100 and experiment with long exposures. Some drones can take up to eight second exposures and maintain sharp focus.
Study an expert’s work
One of the great ways to make your photos better is to study the work of a professional photographer.
The photographer George Steinmetz has been making aerial photographs for decades — even before the rise of affordable drones — while working with publications like National Geographic and The New York Times. He has published five books on aerial photography.
“For intimate aerial photography, a drone is exceptional,” he said, but adding that any type of aerial photography can be transformative.
“You see the world in a way you’re not accustomed to,” he said. “It adds context and a new perspective.”

