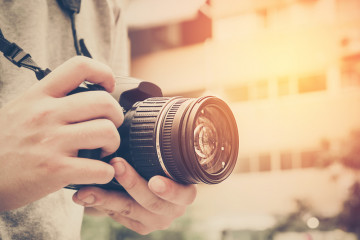
A DSLR is an acronym for a digital single-lens reflex camera, which is a relatively new camera on the market that has combined the digital camera and the optics.
When you purchase your first DSLR it can be intimidating to know how to use all its features. So we’ve put together few useful tips to help get you started in using your new camera.
Shooting Modes
The first thing to get acquainted with when it comes to a new camera are the available shooting modes. The shooting modes determine what happens when you press the shutter to take a picture.
You’ll generally find shooting modes on the dial on the top of your camera, with letters written on it. This dial will always include, at the very minimum, these four letters — P, A (or AV), S (or TV), and M. There will also be a fifth mode entitled “Auto”.
If it’s your first time using a DSLR, we recommended setting your camera to “auto”, as this means the camera will utilize pre-set parameters and adjust settings like exposure, shutter speed and even aperture for you automatically.
As you master the camera you can start experimenting with other modes which give you more control.
Learn About Lighting and ISO
Light plays a crucial role in determining how your picture will look, and the ISO of a camera determines the camera sensitivity to light and the ability to capture it.
The ISO is measured as a numeric number, and you can adjust the settings to suit different lighting conditions. When in natural light conditions, like during the day, it’s advisable to use low ISO, and raise it to be higher in dark conditions.
But keep in mind that if too much light is captured, or you try and compensate for dark surroundings by changing to a high ISO, the image may appear grainy. “A high ISO such as ISO 1,600 will produce a brighter picture than a lower ISO such as ISO 100.” But increasing the ISO creates a lot more grain.
Learn About the Aperture
The aperture is a small set of blades in the lens that controls how much light will enter the camera. The blades create a octagonal shape that can be widened or closed down to a small hole.
This allows you to adjust the lighting, and still take a good picture even if the conditions are too bright. You’ll find that aperture sizes are measured by f-stops. A high f-stop like f-22 means that the aperture hole is quite small, and a low f-stop like f/3.5 means that the aperture is wide open.
If you shoot with the aperture wide open, then more light is allowed into the camera than if the aperture is closed down to only allow a tiny hole of light to enter the camera. The smaller the aperture, the more your subject will be in focus, where-as a wider hole will create a more shallow depth of field.
Shutter Speed
Along with ISO, and aperture, one of the three pillars of photography is Shutter Speed. This is the length of time your camera shutter is open, ie, how long your camera spends taking a photo.
Shutter speed is “responsible for changing the brightness of your photo, and creating dramatic effects by either freezing action or blurring motion.” And how quickly you take a photo will have a profound effect on how your images will appear.
When you have a slow shutter speed you achieve a blurry image effect, especially if your subject is in motion. If you’re aiming for a motion blur, or creating a sense of motion in a landscape shot (like a river or waterfall), this is when you would use a slow shutter.
However if you’re shooting a subject in motion and need a quick, focused shot, whether it’s wildlife, or adventure sports, you’ll need to use a much faster shutter.
Focusing
Today the modern DSLR comes with autofocus, and with every new model, more advanced technology allows cameras to quickly pinpoint the subject you’re focusing on without missing the moment.
We recommend beginners start by utilizing the autofocus features, but after you become more experienced with the camera you can start experimenting with manual focus mode to get more precise control over your shots.
For certain shots, like macro (when you’re shooting something close up with a very shallow the depth of field), manual focus allows you to have complete control over exactly is in focus.
This is also beneficial in crowded settings, where you might want to focus on one specific subject, in low light, or if you’re trying to shoot “through” an object.


